Helppier allows you to fully customize your guide's appearance by defining different colors and positioning on the screen.
First, you need to record a guide and select a bubble template to get started. See this article for more information on this subject.
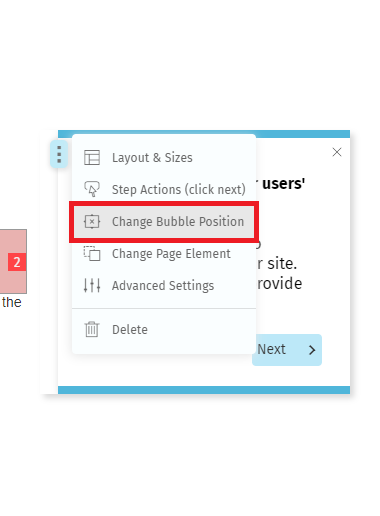
How to change Bubble position (in relation to the element)
1. Once you select an element of the page, Helppier automatically chooses a position.
To change it, click on the option "Change Bubble Position" located in the menu of the step's bubble.
2. A sidebar will appear. In the "Change Position" section, select the option you want by clicking in one of the positions available.
If you'd like to customize the position even further, you can also customize the pixels.
(X stands for the horizontal position on the screen. Y stands for the vertical position.)
![]()
3. Click on the icon Save in the recording bar located at the bottom of the screen.
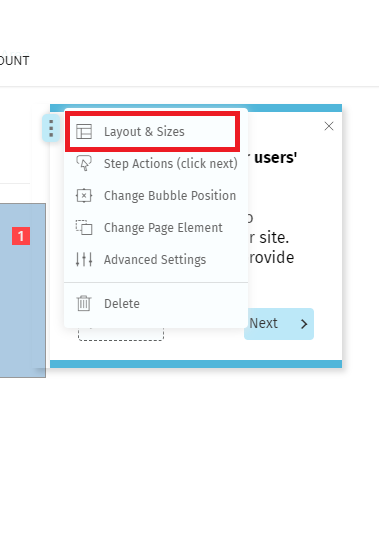
How to change the Bubble's colors
1. During recording mode, click on the option "Layout & Size" in the bubble's menu
2. A sidebar will appear. Click on the second icon located at the top and scroll down to the Appearance section.
To add a background color to the bubble, select a color in the Fill option.
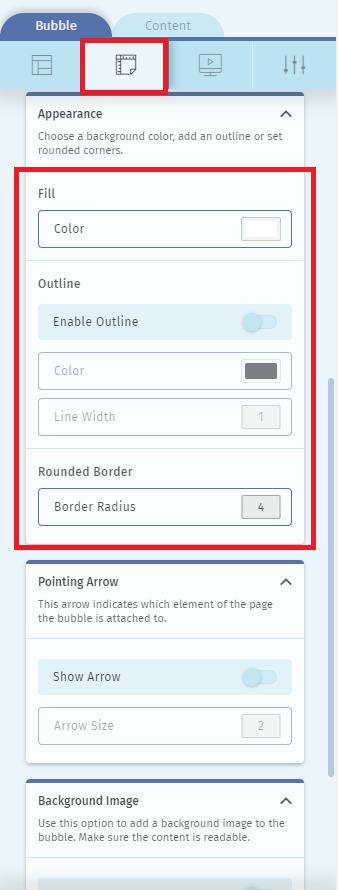
You can also add an outline and define its width. If you'd like to make the bubble look rounder set the Border Radius (the maximum number is 16).
For better readability, make sure to also adjust the text color when editing the content of your step.
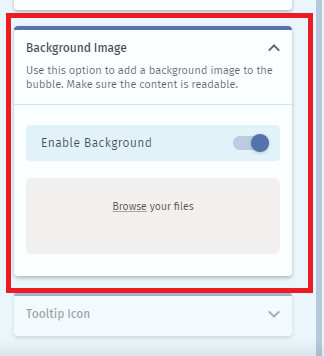
To add a background image to your bubble, you can just upload the image directly in the section below.
Comments
0 comments
Please sign in to leave a comment.